
Straight, 4º Offset, or Helical? Vanes or Feathers? How should I Fletch my arrows?
Sep
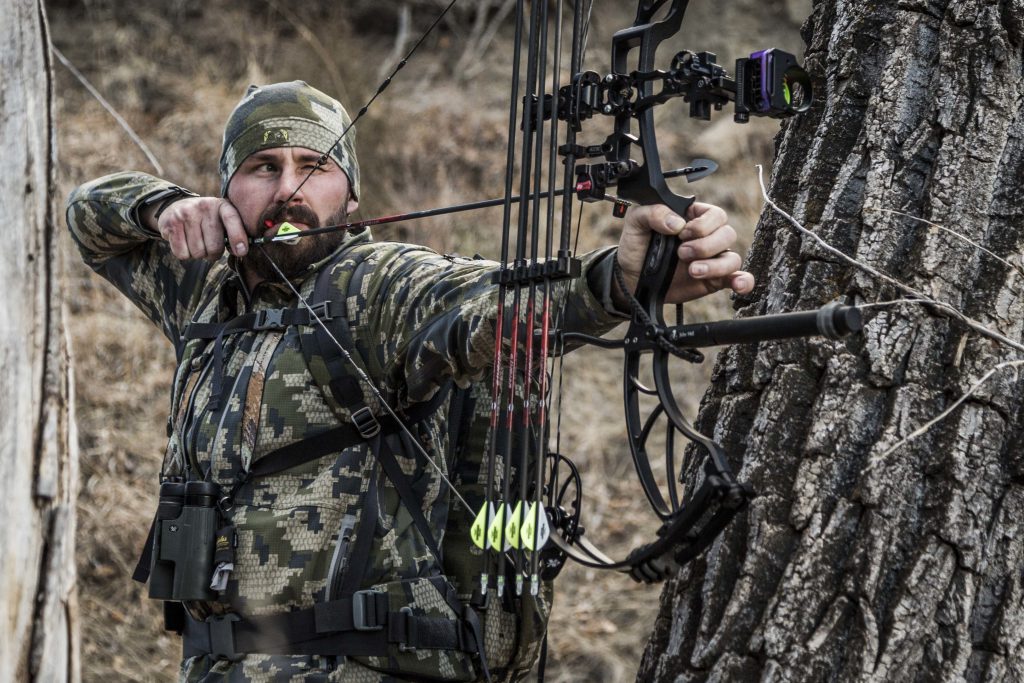
The reason we fletch our arrows!
Anyone that enjoys archery probably understands that accuracy and consistency are the two main ingredients involved with being any good at shooting a bow whatsoever. There are a lot variables that go into making someone an accurate shooter. One of the biggest would be how important it is to find the correct style and type of arrows for your compound bow setup. Once you find your arrows the real challenge comes into play, figuring out how to fletch your arrows in a way that is best suited for your setup.
It does not matter how hard you practice, if you can not trust your arrow to fly straight to where you have aimed, well, then you probably wont be heading to the Olympics to compete in archery anytime soon.
Imagine we are standing 20 yards from a target with a big red bulls-eye painted in the middle. Our goal will be to shoot six arrows at that bulls-eye. Sounds pretty easy, right? Now imagine that the arrows we are using have been fletched with 3″ vanes at a 4º right offset and they work well for the setup we are using. At this distance we will be able to easily put all 6 of those arrows in the bulls-eye without even breaking a sweat. This is all thanks to those little 3″ vanes on our arrows – but we will get back to that here in a second. Now lets imagine taking the exact same shots but this time we are going to strip all the vanes off of our arrows. We then proceed to fire all six of the unguided arrows down range to see if we can hit that bulls-eye. When it is time to see how we did it becomes clear pretty quickly that not only did the arrows not hit in the bulls-eye, but they are not even in the target. One of the six arrows is in the dirt 8 feet in front of the target, another arrow is stuck in the side of a barn 20 feet to the left of the target and the other 4 arrows are no where to be seen. Why did this happen? Do we really suck that bad at shooting our bow? It may be pretty obvious where I am heading with this but just to be clear, no we do not suck that bad at shooting our bow. It was simply because we did not have any fletchings on our arrows.
Now lets imagine the same concept but this time we are going to make it a little more fair. This time the six arrows will all be fletched with 3″ vanes BUT some will be straight, some will be left offset and others right offset or helical. Basically the fletchings will be very inconsistent between each other. We fire all six arrows at the bulls-eye but instead of them all being grouped nicely in the middle, the arrows are scattered all across the target in a very unsatisfying way. Hitting the target was progress but accuracy is still an issue for us at this stage. This is simply because the inconsistent vane configurations allowed for the arrows the be guided differently from one another and this will ultimately make it impossible to be accurate AND consistent from shot to shot!
Helping arrows fly since the very beginning! The bow and arrow is considered to be one of the oldest and most efficient tools that mankind has ever developed. The overall concept of a “bow” has changed drastically since our ancestors invented it and now, thanks to modern compound bows, this little old invention has become a tactical super weapon. We have improved every single aspect of this tool we call a bow and we have made them so powerful that they are now actually capable of speeds just shy of 400 fps. That is a pretty crazy thought right? As a matter of fact, the average hunting bow that we ship out of our shop ready for the field will be flinging arrows at speeds of around 290 – 320 FPS. Keep in mind that these speeds are achieved with a rig not specifically set up for speed but instead is setup with heavier arrows and with an aim to balance kinetic energy and speed. When you start trying to make a bow shoot this fast and hit that hard the need to iron out the perfect arrows and fletchings becomes all the more important.
The concept of sticking feathers on an arrow to help guide said arrow was born back in the very beginning right along side the bow itself. No matter how far we advance the design of a “bow” we will never be able to escape installing fletchings our arrows because physics simply will not allow for it.
How it works in a nutshell! When you fire your bow, the arrow will be sent on a high speed journey down range. The wind will be rushing down the arrow on all sides and this wind will be trying to constantly manipulate the arrow in any way it possibly can. If the arrow has no fletchings installed to help guide it to it’s target then the arrow will be at the mercy of the winds. This means every single arrow you fire without vanes installed will fly erratically making it impossible to be consistent or to even predict where the arrow will hit. By installing vanes or feathers to your arrows you are basically giving your arrow fins to swim through the air towards its target. These “fins” will slice through the wind and use it to help hold the arrow on it’s path to the target. Now, instead of being at the mercy of the wind, you will actually be able to use the wind as an ally. I have personally shot several arrows without any vanes installed (ya know, for science and stuff) and the outcome is pretty wild. I have seen the arrows fly any where from relatively straight, all the way to doing a full circle in mid air before coming back towards me. No two shots were the same so hunting with an arrow like that is not going to happen. The same kind of effect can pop up with arrows that are fletched inconsistently but on a smaller scale. Having the fletchings on the arrows certainly helps but if they are all installed differently you will still end up with different flight patterns between each of your arrows.
What length should you choose?
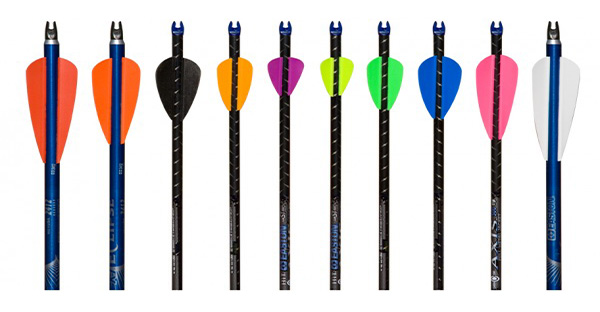
Shorter vs Longer- does it really matter? This question may come up sometimes with other “things” in life but the only area I am qualified to speak on would be the length of your vanes or feathers. You can find vanes and feathers ranging from 0.5″ up to 5.5″ and beyond. The average that most shooters end up using would be between 2″ and 5″ but you can also find any other odd ball size out there for shooters looking for something a little less conventional. Just like anything else in the archery world most shooters have their own opinions on the subject. If you go up to someone and flat out ask their opinion on this subject that person will be quick to tell you what length of vane/feather they prefer. This opinion could be based on years of trial and error that this shooter has personally went through, or it could be that this shooter has just never tried anything else and what they use now simply works for them, or it could be a dozen other reasons. The reason this particular shooter uses what they use is irrelevant but the question is, would something else work better? A lot of the times the answer would be, yes.
The type/length/configuration of the fletching you choose can and will make a difference in your shooting. When attempting to make an educated decision on what to go with there are a few things to keep in mind. Below I am going to lay out a few “rules of thumb” that may help assist you in your journey of selecting a new fletching type for your arrows!
Here are the things to keep in mind when fletching your arrows!
Why most people use vanes instead of feathers for their compound bow setup! Both vanes and feathers have their pros and cons but feathers can be a lot of trouble if they are shot from high powered bows. It is important to understand all the possible problems you could run into with feathers in order to make an educated decision between the two types of fletchings. One thing I can say for certain would be that vanes are used SIGNIFICANTLY more often than feathers these days. The reason for this is simple – feathers are fragile! Vanes are a lot tougher than modern synthetic feathers, hands down. If you have feathers installed on your arrow, and you miss the target, the most likely outcome will be that your feathers are going to get destroyed. The fact these feathers are so fragile can also be limiting because you are not able to use them with most containment rests such as the Whisker Biscuit. The process of the feather passing through something like the bristles of a Whisker Biscuit will shred the feather and cause terrible flight for your arrow. The only good arrow rest option while using feathers would be a drop away rest and those are not for everyone. Another big turn off is that feathers can only be fletched with either a “left helical” or a “right helical” configuration. This is due to the natural curvature of the feather itself. If you try to resist the curve of the feathers and fletch them with a straight or offset configuration, you will basically break the feather and it will not fly very well. Having a “helical” turn is not always an issue but it depends on your situation. If you have a fast compound bow (like most these days) having a helical turn will not offer you any benefits but it will slow you down and cause noise when the arrow is fired. The noise it causes is like a “swooshing” switch in the wind kind of noise caused by the wind but this isn’t always a problem. If you have a lower draw weight/slower bow then you will not have any issues with a helical fletch and may even benefit from using it. These are the most common reasons most shooters avoid feathers while using a modern compound bow.
Picking out the vanes I should use! I would like to make a quick, very important note before we dive in any deeper. At the end of the day, no matter what arrows or fletching style you choose, it is vital to paper tune your arrows to ensure they are leaving your bow correctly. With that said! Here are a few rules of thumb that will help you make an educated decision on which vanes may work best for you and your needs.
How far will you be shooting?
This one is pretty straight forward. If you are building your new setup with dreams of stepping back to 100 yards every single day just because you enjoy a challenge – then you sir need a longer vane. There is not much of a “real life” hunting scenario that would realistically make anyone fire a shot off at an animal from 80-90-100 yards out so if you are shooting back that far it is probably just for the sake of having a good time. If you are going to be sending your arrow sailing from this kind of distance then every little bit of surface area you can give you vane will help guide the arrow. There are not many times I recommend a 4″ – 5″ vane but in this kind of situation it may not hurt. I would at least use a 4″ vane at the very least though. Anything less than that will struggle to guide your arrow consistently and each shot would be more likely to behave differently than the last. While it is possible to shoot from this distance with a short 2″ vane it will not be as stable or predictable compared to a longer vane.The downside of longer vanes would be that they will warp after a while but in this scenario the benefits out weigh the headaches and a longer vane is the better bet for you. If your vanes do end up warping all you have to do is take a hair dryer and heat up the vane. The heat will straighten them right out. I will include a video to demonstrate just how easy it is.
If you are like most shooters and have no plans to shoot beyond 60 yards, well, you can swing a shorter vane without a doubt. This scenario is where the shorter vanes like the 2″ Blazers work really well. Since the distance is nothing crazy a 2″ or 3″ vane will be plenty enough surface area to carry the arrows consistently from shot to shot. Plus shorter vanes are less likely to warp compared to longer vanes, especially the 2″ Blazers. The tricky part comes from picking between a 2″ or 3″ vane but again it just comes down to what you will be doing. If you are anticipating hanging out closer to the 60 yard mark more often than the 20 yard mark than a 3″ vane would be better for you to help handle the extra distance and visa-versa . By getting together a game plan of how far you will be shooting (most often) you will be able to make a better decision on the length of your vanes.
Straight, Offset, or Helical?
Now that we have figured out the best length for our vanes it is time to figure out the configuration. A straight fletch refers to a perfectly straight vane that is installed on the arrow shaft perfectly aligned with the center of the spine. Imagine taking a marker and trying to draw a perfectly straight line down the center of the arrow from the nock towards the tip without the line moving off to the left or right at all. When installing a straight vane the goal is to install it perfectly straight down the center, just like our line. You can tell a straight vane by looking down the shaft of the arrow from nock to tip like you are aiming down the barrel of a shotgun. When you do this you are looking to see if the base of the vane runs straight down the shaft without going off to the left or right at all. If so then you have a straight vane. The benefit of a straight vane is zero speed loss. Since the vane does not veer off to the left or right the vane it’self will not be forced to spin by the wind. This means the arrow is not slowed by the vane catching wind and the vanes are instead just slicing through the wind. Unfortunately this also means the arrow is resisting a spin causing it to become slightly less stable. This is an effect that is hard to notice at shorter distances but it can make things a little harder for you once you start getting back to 40 yards or more.
An offset fletch is a little more effective when it comes to stabilization. You still have a straight vane (meaning the vane itself is not curved) but the front of the vane veers off to the left of right on the arrow. Imagine taking that marker we mentioned earlier and drawing a straight line down the center of the arrow from the nock to tip. This time make the line move towards the left /right at a very small 4º angle as you continue to draw the line down the arrow shaft. This very small angle is what defines an offset configuration. To spot of offset fletch we would look down an arrow from nock to tip like aiming down the barrel of a shot gun. This time we will see the front of the vane move off to the left or right as it moves towards the tip of the arrow. It really does not matter if it is left or right offset because the end result is the same. Most shooters go with a right offset because a left offset causes your arrow to spin in a direction that can loosen your tips in the target when the arrow makes impact. By using an offset the vane is able to catch just enough wind to allow for it to spin. This causes a sort of riffling effect like you would see on a bullet leaving the barrel of a gun. The wind will cause the arrow to spin and this spin gives the arrow greater stability and accuracy. The downside here would be a VERY small amount of speed loss but it is not much. When compared to a straight fletch an offset fletch was an average of 2-3 FPS slower which is not very much in the long run.
A helical fletch is basically an extreme version of an offset fletch. The vane will no longer be straight but instead it will have a curve in the middle. You will then install the vane with a steep offset while putting this curve in the vane. The end result will look like the vane is wrapping around the arrow just a little. Using a helical configuration will give you a significant spin. This spin will help stabilize your arrow and improve accuracy. The downside to a helical fletch is that since the turn is so steep the vane catches a lot of wind. Due to the helical turn catching so much wind you will see the most speed loss compared to the other configurations. We have seen a helical turn slow an arrow down anywhere from 5-8 FPS or more but it varies depending on the setup. Choosing either a right or left helical doesn’t really effect anything. Most people go with a right helical because using a left helical spin can loosen your tips up once the arrow hits the target just like with a left offset spin.
For a lot of shooters choosing which turn to use can really help tighten a group. The turn we recommend most often is just a simple “offset” configuration. An offset is enough to give your arrow a good, stable spin without causing too much wind resistance and speed loss. A straight fletch prevents the wind resistance you would see by using an offset/helical turn on your vanes but it also eliminates the helpful riffling effect needed to stabilize your arrow. A helical fletch can work very well if you are using a low draw weight/low speed bow. While shooting a slower bow like a traditional bow or a light draw weight compound bow, any and all spin can help stabilize your arrow. The extra stabilization you get from the helical turn in this situation will be more beneficial to you than the couple of feet per second you may lose by using a helical turn.
The best option most of the time!
Over the years we have built and customized tens of thousands of compound bow setups and in that time we have figured out a few “safe bets” for setting up arrows. We primarily set up bows for hunting and since we are hunters ourselves we always keep that a few things in mind. Most hunters will never shoot at something further than 60 yards tops (generally speaking). Another characteristic most hunting bows share would be that most are of sufficient power and capable of speeds of at least 220 FPS. This means the bow itself is able to propel the arrow with some pretty serious get up and go. Based on this information we are able to start with a pretty firm idea of what we want from the performance of the arrows we build our customers. More often than not the length of vane we find that works the best is a 3″ vane because it is long enough to help at those longer distances but still plenty durable. The configuration we find that works out the best would be the 4º Right Offset because it causes enough spin for stabilization but not so much spin that you start to see issues like you would with a helical turn. This 3″ vane 4º offset configuration will allow for shooters to be as accurate as possible ranging from 10 yards all the way out to that 60 yard sweet spot. Keep in mind that this can and will vary from setup to setup and at the end of the day we let the paper tuning process make the decision. We have used all configurations many times over the years when the situation called for it. The 3″ vane at 4º right offset is simply the configurations that works best most often.
Of coarse it is possible for someone to shoot and hit a target using other combinations then the ones I have touched base on but in our opinion this is the best option for accuracy. Shooting beyond the 60 yard mark with a 3″ vane at 4º r-offset is doable but if it was something you were doing constantly you would be better off with a longer vane. If you find your self in a position where you are trying to get the best possible vane configuration but you are not sure what you should go with, just think about all of these factors and you should be able to end up with the configuration that will work best for you. Shooting compound bows is an art and it is something we take very seriously. Any little thing we as shooters can do to make our shots better and more consistent is something we certainly should be doing! Making out setups the best they can be is an important first step and after that it is up to us.
Hi, this is a comment.
To get started with moderating, editing, and deleting comments, please visit the Comments screen in the dashboard.
Commenter avatars come from Gravatar.